MSX Assembly 101: 01 Introduction
This is hopefully the first post in a series devoted to assembly programming for MSX computers.
A little bit of history
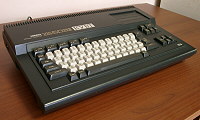
When I was a schoolboy (and now I am over 50) we had Yamaha computers in school. They were implementing MSX standard and had Zilog Z80 CPU. Recently I have got interested in retrocomputing, and, while I do not have older hardware, there are multiple emulators, and I can even run MSX emulator on my Android TV (which has Bluetooth keyboard connected to it). Playing with MSX I feel like I am young and back at school again.
I have never really learned Z80 assembly programming in school, and I was mostly using Turbo-Pascal. While I have a copy of it and it runs perfectly in emulators, at this tender age I want to do closer-to-hardware development.
Assumptions
I am a professional software developer, and I know a thing or two about CPUs and assembly in general, so when I was starting I have quickly discovered that there are basically two types of documentation:
- Technical specifications;
- Tutorial articles, which spend multiple pages explaining programming in general (“what is variable?”) and CPUs (“what is CPU register?”).
The former are good but do expect a bit too much familiarity with the subject from the reader. The latter are for me extremely slow and annoying.
I expect that the reader:
- can do programming;
- knows about low-level stuff and CPUs a bit (I am not going to explain what is a register, what is memory, what is a pointer, what is the difference between RAM and ROM);
- probably can program somehow in some assembly language;
- reasonably comfortable with command line.
Setup
My setup is based on editing programs on my usual work machine, using cross-assembler to convert them in MSX cartridges, and emulation for running the code.
I have successfully tried this setup on Windows 11; however, I normally run things over VNC in LXQT on FreeBSD 14-STABLE. I do not think there will be any problems with running things under Linux.
Editor
The assembly programs are just text files, so any text editor can be used to write them. I use vim together with vim-z80 for highlighting. The plugin is not ideal due to the (cross-)assembler I am using (see below) but is good enough.
I also use my own MSX-like colorscheme for vim. Notice that screenshot on GitHub is obsolete: now the main color is white not yellow.
Assembler
I use cross-assembler called asMSX. Notice that you want “modern” version of it I have linked to. While there is no ready-made release for FreeBSD or FreeBSD package, the compilation from the sources was most straightforward.
There are other existing cross-assemblers for Z80, and I think they will work too. I use asMSX as it has some MSX-specific niceties (e.g. there are names for BIOS calls, and you do not need to create cartridge header manually).
Emulator
It seems that the two most popular MSX emulators are blueMSX and openMSX, I use
fMSX. No, I do not have a good reason for that.
I run it as fmsx -scale 4 -skip 0.
Setup verification
To verify the setup, we will create small assembler program, outputting letter
A, compile it to cartridge, and run it.
Start with creating the following assembler program first.asm:
.PAGE 1
.ROM
.BIOS

        ld      a,'A'
        call    CHPUT
@@end:
        jr @@end
You will notice some niceties, provided to us by asMSX assembler: .PAGE 1 is,
basically, what you need to start cartridge code with, and just tells the
assembler that everything starts from the address 0x4000 (.ORG 0x4000 will
do the same).
The next directive .ROM tells the assembler to generate the
cartridge header (one can think about cartridge as about ROM with program code,
which will be auto-executed). Normally cartridge header consists of bytes AB,
the address of entry point (by default, the assembler assumes that the code
starts straight from the top, but there is a way to change that) and padding.
The cartridge also should be of the certain size (this can be achieved by
putting the second .ORG in the end). It is convenient, that asMSX will take
care about these details.
Then there is .BIOS directive, which instructs the assembler to use symbolic
names for BIOS routines. I think it is much nicer to write call CHPUT to ask
the system to output the character with the code in the accumulator register a
then call 0x00A2 (which it gets translated to).
The next step is the compilation of the program into .rom cartridge file, and
it is as easy as running asmsx first.asm. Approximately the following output
will be produced:
-------------------------------------------------------------------------------
 asMSX v1.1.0-7-g2bd274b MSX cross-assembler. asMSX Team. [2023-11-20]
 -------------------------------------------------------------------------------

 Parsing file first.asm
 Expanding Macros
 DONE Expanding Macros
 Expanding REPT
 Assembling source file first.asm
 Assembling labels, calls and jumps
 Binary file first.rom saved
 Symbol file first.sym saved
 Completed in 0.01 seconds
Also (besides meaningless ~tmppre.*) two files will be produced: first.sym
and first.rom. The first contains comments and the symbol table, produced by
the assembler. We have exactly one label – @@end – and it will be listed
there with the corresponding address 4015h (remember that .PAGE 1 directive
said, that we start everything at 0x4000). The second file – first.rom –
is the image of our cartridge.
Before running the code, we can do two things with first.rom. First, you can
check its size (for example, with ls -l first.rom) and see, that it is
exactly 8k as required (8192 bytes). Second, we can look into this file. For
example, with xxd it is possible to run xxd -c 1 -l 24 first.rom, getting
00000000: 41  A
00000001: 42  B
00000002: 10  .
00000003: 40  @
00000004: 00  .
00000005: 00  .
00000006: 00  .
00000007: 00  .
00000008: 00  .
00000009: 00  .
0000000a: 00  .
0000000b: 00  .
0000000c: 00  .
0000000d: 00  .
0000000e: 00  .
0000000f: 00  .
00000010: 3e  >
00000011: 41  A
00000012: cd  .
00000013: a2  .
00000014: 00  .
00000015: 18  .
00000016: fe  .
00000017: 00  .
As you can see, in the beginning we have the header for the cartridge: bytes
AB, then the address of entry point (4010, written as little-endian),
then padding. At the address 0x4010 the code starts (remember .PAGE 1?). The
opcode 0x3e means to load the following byte (0x41, which is the code of A
letter) into the accumulator register a. The following 0xcd means “call”,
a call of subroutine; its address (again little-endian notation) is 0x00a2,
which is a BIOS routine for putting a character on the screen. After that
follows 0x18 – relative jump (“jr”), and 0xfe is basically -2, causing the
program to go to the address 0x4015 (which you can see in first.sym as
@@end label instead of the next 0x4017, entering an endless loop.
Now time has come to run the code. Launch fmsx, press F10 key, navigate to
“Cartridge slots”, then to “Slot A:”, “Load cartridge”, and choose freshly
compiled first.rom. The (emulated) computer will reboot (as it should when a
cartridge is inserted), and the code will be auto-executed, printing letter A
to screen.
Another way to see the code would be to add -trap 4015h to fmsx invocation.
When the emulator reaches the specified address (which corresponds to the
@@end label) it will enter debugging screen, and you will be able to use arrow
keys to look at the code around.